Transparent captures for the Premium Store: a render pipeline fix and three Unity tools
Adriano Muricy · 3D Generalist / Technical Artist
Gameloft Montreal · live-ops store pipeline
Summary
- The problem: lack of procedures and tools to generate images of in-game store items, burdening Capture Artists and 2D Artists with overtime hours of recaptures and paintover work.
- The solution: transparent output out of the custom URP pipeline, plus a set of in-engine, artist-friendly tools to mask, switch and pose the assets before the capture.
- The results: paintover work eliminated for half the images. The assets that still need paintover are now done 50% faster.
The Premium Store
My first task at Gameloft as a 3D Generalist was to solve the lack of transparent images for the in-game items shop, the Premium Store. Every update, a number between 80 and 100 new live ops items are made available for sale to the players, grouped as bundles, each bundle requiring one render. One bundle can have multiple items in it, so the total image count varies. The custom URP pipeline did not support rendering out images with an alpha channel.
Everything was done manually. The Capture Artists would search for an item in the asset browser, drag it over the green or magenta screen scene and capture the items in multiple states against that background. For characters and avatars wearing outfits, timelines and animation tracks had to be manually added to the characters, and to the proper root of each piece of clothing for the avatars. Then the 2D Artists would color key and polish them, removing the backgrounds and painting over the assets to mask the errors and imperfections.
The requirements are not loose, either. The capture guidelines ask for 8K exports, lights on for every asset, VFX visible, no front or side views, a subtle high angle for depth, and the same angle across colour variants of the same item. Outfits alone need three captures each — mannequin, mannequin with outfit, and the outfit by itself — and two mannequins facing each other when a bundle has two outfits.
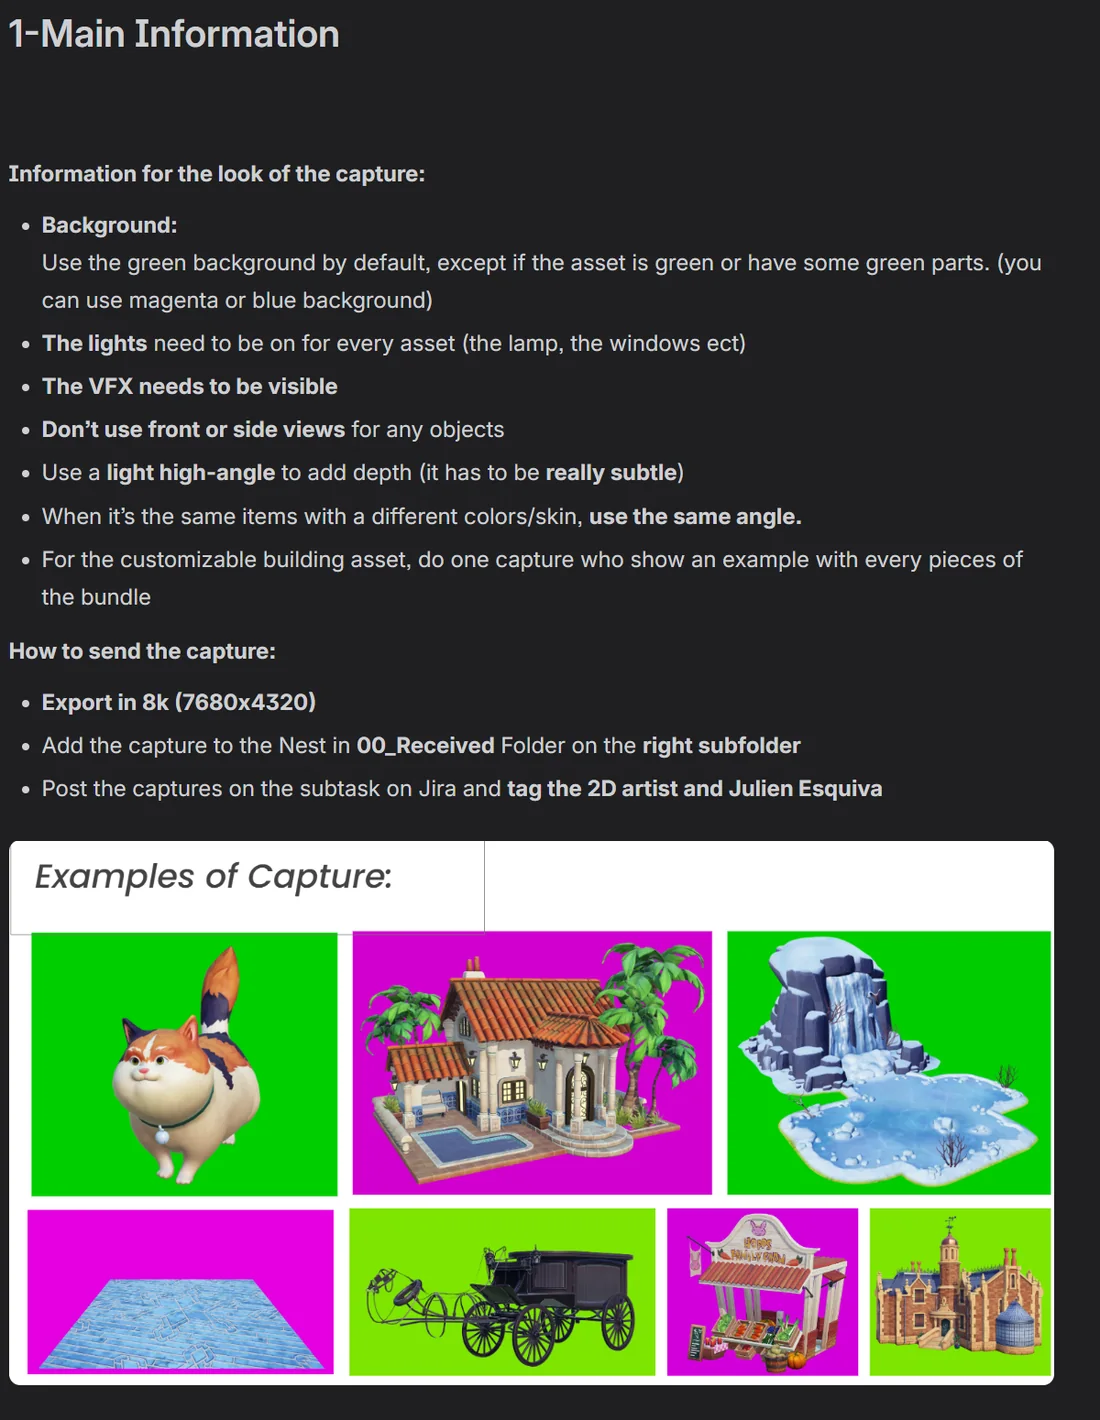
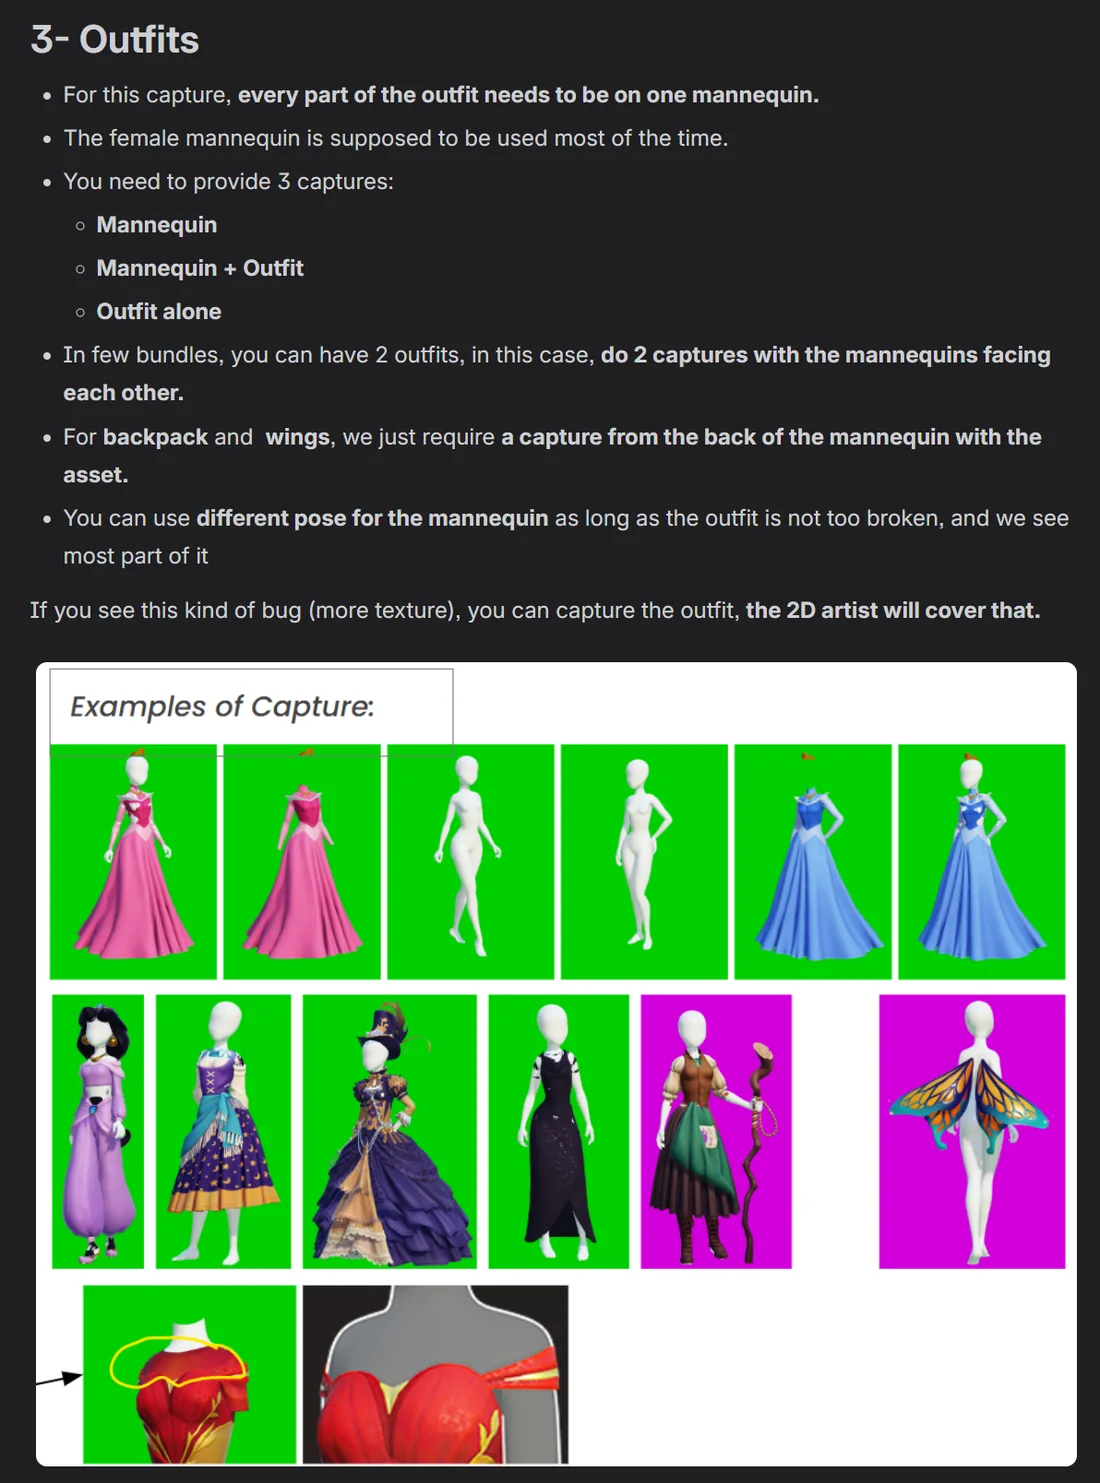
There are different categories of items: Buildings & Furniture, VFX, Avatar Outfits, and Characters/Companions, and I noticed each one of them presented its own rendering challenges. It was clear I needed a proper alpha channel in every case, and I would also need an in-editor tool to mask the Avatar Outfits.
Getting alpha out of a custom URP
I went through a mix of YouTube tutorials, documentation and Unity forums, and managed to find the proper combination of settings to output transparent images out of the custom render pipeline — but there was no way to include the Post Processing effects.
At first, I set up two recorders with the same camera settings and angle: one to render the colour output against a black background, and the other to capture the transparent image without post processing. A simple compositing nodetree in Blender then combined the two, resized the result and generated the final output. The setup was not ideal, but it was already much faster and generated clean masks, even for some VFX heavy assets, so I stuck with it for a few updates.
The camera capturing the colour image kept throwing an uncommon buffer warning, so I reached out to one of the graphics programmers to get their input. The next and final iteration of the solution turned out to be quite simple: raising the HDR precision of the Rendering Asset to 64 bit made the compositing step obsolete. The project was now fully set up to generate transparent images, with post processing effects and clean masks, straight out of the engine.
Avatar outfits: three tools to make them capturable
Of the four categories, Avatar Outfits were the ones that could not be solved by render settings alone. A building or a piece of furniture is a single prefab you drop in the scene and shoot. An avatar outfit is an assembly: a body prefab plus one prefab per piece of clothing, all of them living under the same root and all of them expecting runtime systems to sort out what is visible and what is not. In the editor, none of those systems run. So I ended up writing three separate tools, each one covering a different part of the problem.
Clothing Masker Tool
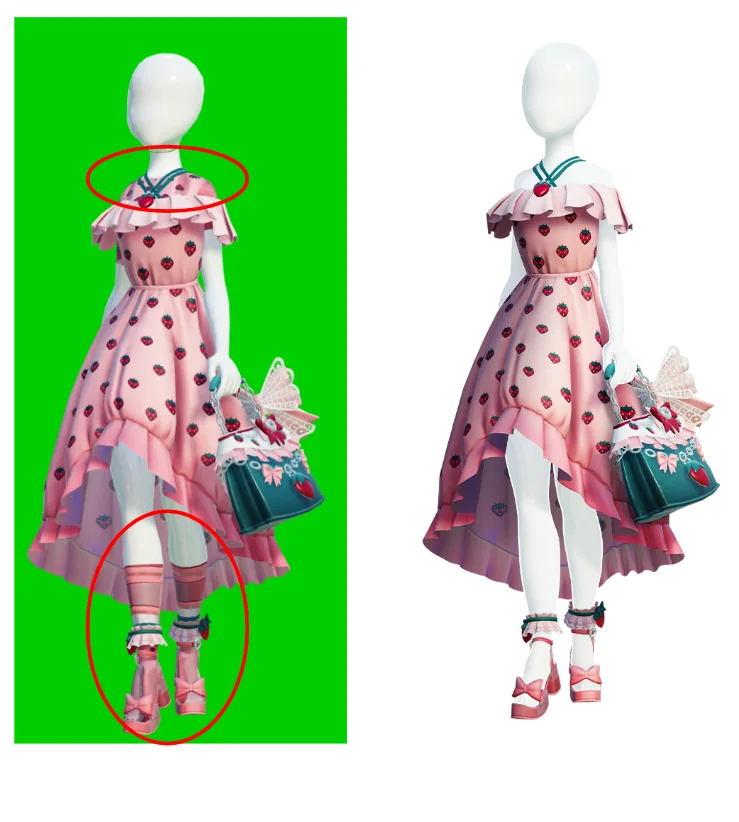
At runtime, the game hides the body parts that are covered by clothing. Each clothing prefab carries a script that declares which body materials it hides, plus the exceptions for cases where two garments overlap, and the mesh combiner resolves all of that before anything is drawn. In the editor the body is simply there, poking through every shirt, every pair of pants, every boot.
The Clothing Masker Tool replicates that resolution step without playing the scene. You drop the avatar root in the window and assign a material with alpha at zero. The tool finds every clothing script under the root, accumulates the list of body parts to hide, applies the overlap exceptions on top of that list, and then walks every SkinnedMeshRenderer in the hierarchy replacing the matching material slots with the transparent one. Names are normalized before matching, because material naming across the item library is not as consistent as I would like it to be.
There is one more case the material swap does not cover. Some meshes pack skin and garment in the same submesh and separate them by vertex alpha, which the combiner splits at runtime. Replacing that submesh with a transparent material would delete the exposed skin along with the garment. So the tool has an optional Split Skin Faces pass that does the same thing the combiner does: it moves every triangle with a vertex alpha above the threshold into a new submesh and assigns the skin material to it. It works on a clone of the mesh, so the source asset is never touched.
The whole thing is one window with two buttons, Replace and Restore, a validation block that tells you what is missing before you press anything, and a log that lists every slot it touched and every part it was asked to hide but could not find in the hierarchy. Restore puts the original materials and the original meshes back, and standard Ctrl+Z works as well.
Material Switcher
The masking work is not always about the body. Sometimes what we need is a matte: the outfit in solid white against black, or the body held out so that only the clothes remain in the pass. That used to be a manual material assignment across a dozen renderers, and then a manual reassignment back.
The Material Switcher does it as a toggle. It takes a root object and a replacement material, which in practice is either a white unlit material or a holdout, and it has two modes. The first one matches material names against a list of comma-separated filter terms, which defaults to the body part names we use most often and is editable in the window, with an option to ignore capitalization. The second one ignores the filter entirely and replaces every material slot on every active renderer under the root. It stores the original material of every slot it changes, so the same button that switched everything switches it back, and it registers the change with Undo either way.
Outfit Animation Cycler
The last piece was the poses. Every outfit is captured in more than one animation state, and setting that up by hand meant adding a timeline and an animation track to the character, and for avatars to the root of each individual piece of clothing, then swapping the clip in every one of those tracks for every capture. It was mechanical work, and mechanical work done sixty times in an afternoon is where mistakes come from.
The Cycler keeps a queue of animation clips in the window. You select the object holding the PlayableDirector and press Next, and the tool replaces the clip on every animation track of the assigned timeline at once, renames the strips so the Timeline window still reads correctly, rebuilds the director graph and re-evaluates it at the current time so the pose updates in the viewport immediately. Prev and Next step through the queue, and the active entry is highlighted in the list.
Together
None of these three tools is complicated on its own. What made them worth building is that they turned the avatar outfit workflow from a sequence of manual operations that had to be remembered in the right order into three windows with a handful of buttons, all of them reversible.
Results
Paintover was eliminated for half of the store images, and the ones that still need it are finished around 50% faster. That number is not mine — I asked the Lead 2D Artist directly:
I would say on average I save about 50% of my time. But heck, just tally all the assets that need no paintover and compare them to the assets that do: each one that needs no paintover saves at least 30 mins, sometimes more.
The same conversation produced the next adjustment to the guidelines: for the assets that still need paint over, a 4K square capture means less masking of raw edge pixels on his side.
Next steps
- Jira/Unity link. I started developing an automated system in Unity that reads the specifications and in-project paths of the items from a .CSV file exported from Jira. It instances each bundle of items under a properly named empty object.
- Separate VFX with a fake depth pass. For buildings and furniture where the VFX has to read on top of the asset, rendering the effects in their own pass with a fake depth pass keeps the sorting correct without paintover.
Tags: unity, engine tooling, pipeline, rendering, marketing, automation, compositing, scripting.